- Afrikaans
- Albanian
- Amharic
- Arabic
- Armenian
- Azerbaijani
- Basque
- Belarusian
- Bengali
- Bosnian
- Bulgarian
- Catalan
- Cebuano
- Corsican
- Croatian
- Czech
- Danish
- Dutch
- English
- Esperanto
- Estonian
- Finnish
- French
- Frisian
- Galician
- Georgian
- German
- Greek
- Gujarati
- Haitian Creole
- hausa
- hawaiian
- Hebrew
- Hindi
- Miao
- Hungarian
- Icelandic
- igbo
- Indonesian
- irish
- Italian
- Japanese
- Javanese
- Kannada
- kazakh
- Khmer
- Rwandese
- Korean
- Kurdish
- Kyrgyz
- Lao
- Latin
- Latvian
- Lithuanian
- Luxembourgish
- Macedonian
- Malgashi
- Malay
- Malayalam
- Maltese
- Maori
- Marathi
- Mongolian
- Myanmar
- Nepali
- Norwegian
- Norwegian
- Occitan
- Pashto
- Persian
- Polish
- Portuguese
- Punjabi
- Romanian
- Russian
- Samoan
- Scottish Gaelic
- Serbian
- Sesotho
- Shona
- Sindhi
- Sinhala
- Slovak
- Slovenian
- Somali
- Spanish
- Sundanese
- Swahili
- Swedish
- Tagalog
- Tajik
- Tamil
- Tatar
- Telugu
- Thai
- Turkish
- Turkmen
- Ukrainian
- Urdu
- Uighur
- Uzbek
- Vietnamese
- Welsh
- Bantu
- Yiddish
- Yoruba
- Zulu
Aug . 13, 2024 08:22 Back to list
Step-by-step guide to fine-tune the rear derailleur on your mountain bike for optimal performance
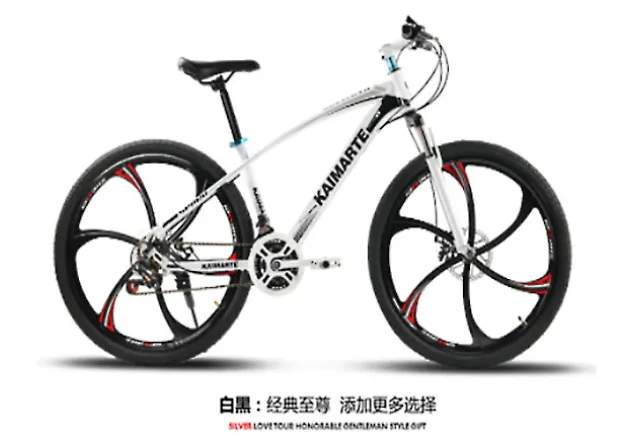
How to Adjust the Rear Derailleur on a Mountain Bike
Adjusting the rear derailleur on a mountain bike is an essential skill for any cyclist. A well-functioning derailleur ensures smooth gear transitions, enhancing your riding experience. Whether you’re climbing steep hills or navigating technical trails, proper gear shifts can make all the difference. This guide will provide you with a step-by-step approach to adjusting your rear derailleur.
Tools You Will Need
Before you begin, gather the necessary tools - Phillips or flathead screwdriver (depending on your derailleur model) - 5mm Allen wrench (for some models) - Chain checker (optional, for assessing chain wear) - Lubricant spray (for chain maintenance) - Bicycle stand (optional, for easier access)
Step 1 Inspect the Derailleur and Chain
Before making any adjustments, visually inspect the rear derailleur and chain. Check for dirt, damage, or excessive wear. If your chain is worn, replace it to ensure smooth shifting. Clean the derailleur and chain with a appropriate lubricant, as grime can hinder function.
Step 2 Setting the Limit Screws
The rear derailleur has limit screws that regulate how far the derailleur can move. There are two screws the ‘H’ (high) screw and the ‘L’ (low) screw.
1. High Limit (H) This screw controls how far the derailleur moves toward the smallest (high) gear. With the bike in the smallest gear on the rear cassette, use a screwdriver to adjust the ‘H’ screw until the derailleur is aligned with the smallest cog. Ensure the chain does not fall off into the spokes.
2. Low Limit (L) This screw controls the movement toward the largest (low) gear. Shift the bike to the largest cog and adjust the ‘L’ screw until the derailleur is aligned with that cog, ensuring the chain is properly positioned without overshifting.
how to adjust rear derailleur on a mountain bike

Step 3 Cable Tension Adjustment
After setting the limit screws, check the tension of the derailleur cable. If the gear shifts are sluggish or misaligned, you’ll need to adjust the tension
1. Shift to the middle gear on your rear cassette. 2. Look for the barrel adjuster on the derailleur or shifter. Turning the adjuster clockwise tightens the cable, while counterclockwise loosens it. 3. Test ride the bike, adjusting as necessary until shifts are crisp and immediate.
Step 4 Indexing the Gears
Indexing ensures that the derailleur moves accurately between gears. While riding, shift through all the gears and listen closely. If there are any hesitations or jumps between gears, further adjust the barrel adjuster to fine-tune the shifts.
Step 5 Final Adjustments
After adjusting the limit screws, cable tension, and indexing, check your adjustments again through a thorough test ride. Pay attention to cross chaining (using large front gear with the largest rear cog, or vice versa), as this can lead to poor shifting performance.
Conclusion
Adjusting the rear derailleur on your mountain bike is a vital maintenance skill that can dramatically improve your riding experience. By following these steps, you will ensure that your bike shifts smoothly and efficiently, making your rides more enjoyable and allowing you to focus on the trail ahead. Regular maintenance and timely adjustments can extend the life of your components, providing a rewarding cycling experience for years to come. Remember, practice makes perfect, and with time, you will become more adept at this essential biking skill.
-
The Ultimate Kids' Four-Wheeler Experience
NewsJul.09,2025
-
The Ultimate Guide to Mountain Bikes: Gear Up for Your Ride
NewsJul.09,2025
-
The New Age of Cycling: Electric Bikes for Every Rider
NewsJul.09,2025
-
The Best Kids Bicycles: Ride in Style and Safety
NewsJul.09,2025
-
The Best 3-Wheel Scooters for Kids: Fun, Safety, and Adventure
NewsJul.09,2025
-
Revolutionize Your Ride: Affordable Electric Bikes
NewsJul.09,2025
-
Finding the Perfect Mountain Bike for Every Rider
NewsJul.09,2025


