Mar . 05, 2025 06:54 Back to list
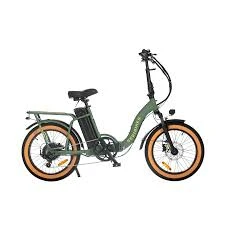
27.5/29 "Color-Changing Carbon Fiber Mountain Bike 12 Variable Speed Mountain Bike Dirt Bike


6. Shift and Adjust Test the shifting by moving up to the larger chainrings. If shifting requires excessive force, or the chain rubs against the derailleur, adjust the cable tension slightly using the barrel adjuster. Small increments are key—precision matters in fine-tuning. 7. High Limit Adjustment Shift to the largest chainring and smallest rear cog combination. Adjust the H screw to prevent the chain from pushing beyond the largest chainring. The cage should again be close to the chain without making contact. 8. Performance Test Conduct several shifts across the range to ensure smooth transitions without hesitation or noise. Each shift should be instantaneous, requiring minimal force on the shifter lever. 9. Consulting with Experts While this guide enables at-home adjustments, consulting with a professional bike mechanic can offer additional insights tailored to your specific riding style and bike setup. This is especially recommended for complex issues or high-end bikes with intricate systems like electronic or hydraulic shifting. 10. Regular Maintenance Regularly inspect and maintain your derailleur system. Dirt, mud, and debris are common on the trails and can obstruct performance. Routine cleaning and adjustment checks keep everything running in top condition. Adjusting a front derailleur on a mountain bike is not just about mechanical understanding but also about practice and patience. Mastering this skill empowers riders with the knowledge to manage their bikes independently, building trust in their own capabilities and ensuring a superior riding experience. With this guidance, you can not only maintain your bike's performance but also extend its longevity and reliability, making every mountain trail an adventure waiting to be conquered.
-
Discover Top E Bike Brand Insights, Specs & Future Trends | Yanline Bike
NewsNov.24,2025
-
Green E Bike – The Future of Sustainable Urban Mobility
NewsNov.24,2025
-
Ruffian eBike: Durable, Efficient Electric Bikes for Modern Mobility
NewsNov.23,2025
-
Comprehensive Guide to the Global E Bike Market and Future Trends
NewsNov.23,2025
-
Understanding Electric Bicycle Range: A Complete Guide for Smarter E-Bike Use
NewsNov.22,2025
-
Ceron Electric Bike – Efficient, Sustainable Urban Mobility Solutions
NewsNov.22,2025
-
Discover the Benefits and Innovations of Go Ebike | Sustainable Urban Mobility
NewsNov.22,2025


