- Afrikaans
- Albanian
- Amharic
- Arabic
- Armenian
- Azerbaijani
- Basque
- Belarusian
- Bengali
- Bosnian
- Bulgarian
- Catalan
- Cebuano
- Corsican
- Croatian
- Czech
- Danish
- Dutch
- English
- Esperanto
- Estonian
- Finnish
- French
- Frisian
- Galician
- Georgian
- German
- Greek
- Gujarati
- Haitian Creole
- hausa
- hawaiian
- Hebrew
- Hindi
- Miao
- Hungarian
- Icelandic
- igbo
- Indonesian
- irish
- Italian
- Japanese
- Javanese
- Kannada
- kazakh
- Khmer
- Rwandese
- Korean
- Kurdish
- Kyrgyz
- Lao
- Latin
- Latvian
- Lithuanian
- Luxembourgish
- Macedonian
- Malgashi
- Malay
- Malayalam
- Maltese
- Maori
- Marathi
- Mongolian
- Myanmar
- Nepali
- Norwegian
- Norwegian
- Occitan
- Pashto
- Persian
- Polish
- Portuguese
- Punjabi
- Romanian
- Russian
- Samoan
- Scottish Gaelic
- Serbian
- Sesotho
- Shona
- Sindhi
- Sinhala
- Slovak
- Slovenian
- Somali
- Spanish
- Sundanese
- Swahili
- Swedish
- Tagalog
- Tajik
- Tamil
- Tatar
- Telugu
- Thai
- Turkish
- Turkmen
- Ukrainian
- Urdu
- Uighur
- Uzbek
- Vietnamese
- Welsh
- Bantu
- Yiddish
- Yoruba
- Zulu
Oct . 15, 2024 09:45 Back to list
Steps to Swap Out Your Mountain Bike Derailleur for Optimal Performance
How to Replace the Derailleur on a Mountain Bike
Replacing the derailleur on a mountain bike can seem like a daunting task, especially for those new to bike maintenance. However, with the right tools, some patience, and attention to detail, you can easily complete this task yourself. This guide will walk you through the steps needed to replace the derailleur on your mountain bike effectively.
Understanding the Derailleur
Before diving into the replacement process, it’s essential to understand what a derailleur does. The derailleur is a mechanism that moves the chain between different gears on your cassette. It plays a crucial role in shifting gears efficiently and ensuring a smooth ride. Over time and with heavy use, derailleurs can become worn out or damaged, necessitating their replacement.
Tools You Will Need
To replace your derailleur, you will need the following tools
1. Allen wrenches (usually 4mm, 5mm, and possibly 6mm) 2. Screwdriver (Philips head) 3. Chain tool (if you need to remove the chain) 4. Torque wrench (optional but recommended) 5. Replacement derailleur
Steps to Replace the Derailleur
1. Prepare Your Bike Place your mountain bike on a stable work stand if you have one. This will make the replacement process easier and keep your bike secure. Shift your gears to the smallest chainring and the smallest rear cog to relieve tension on the derailleur.
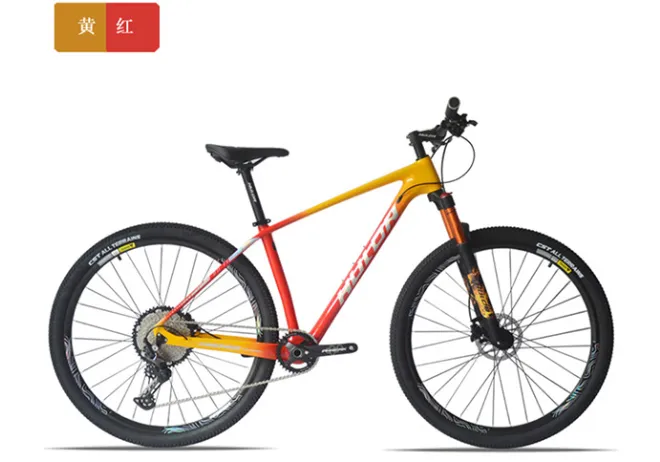
how to replace derailleur on mountain bike

2. Remove the Old Derailleur Begin by locating the derailleur on your bike. It is usually attached to the rear dropout using a derailleur hanger. Use your Allen wrench to unscrew the bolt holding the derailleur in place. Additionally, if your derailleur has a chain, use the chain tool to remove it if necessary.
3. Disconnect the Cable Following the removal of the derailleur, you will need to disconnect the shifting cable. Locate the cable anchor bolt on the derailleur and loosen it using your screwdriver. Carefully remove the cable from its housing, ensuring it isn't frayed or damaged, as you'll need to replace it if it is.
4. Install the New Derailleur Take your new derailleur and attach it to the derailleur hanger in the same position as the old one. Tighten the bolt securely ensuring it’s aligned correctly to avoid any shifting issues later.
5. Reconnect the Shifting Cable Thread the shifting cable back through the housing and attach it to the new derailleur. Ensure that the cable is taut but not overly tight, and then tighten the cable anchor bolt to secure it.
6. Reinstall the Chain If you removed the chain during the replacement, now is the time to reinstall it. Ensure that the chain runs through the correct jockey wheels of the derailleur.
7. Adjusting the Derailleur Once everything is reattached, you will need to make some fine adjustments. Shift through all the gears and observe how smoothly the chain shifts. If it hesitates or skips, you may need to make some adjustments to the limit screws and tension on the cable. Consult the derailleur’s manual for specific instructions on how to tweak these settings.
8. Test Ride After making the necessary adjustments, take your bike for a short test ride. Pay attention to the gear shifts and make any final tweaks to the derailleur settings as needed.
Conclusion
Replacing the derailleur on your mountain bike can be a rewarding DIY project that enhances your bike’s performance. By following these steps meticulously, not only do you save time and money compared to a shop visit, but you also gain the confidence to tackle more bike maintenance tasks in the future. Remember to keep your bike components clean and well-maintained to prolong their lifespan and performance!
-
The Ultimate Kids' Four-Wheeler Experience
NewsJul.09,2025
-
The Ultimate Guide to Mountain Bikes: Gear Up for Your Ride
NewsJul.09,2025
-
The New Age of Cycling: Electric Bikes for Every Rider
NewsJul.09,2025
-
The Best Kids Bicycles: Ride in Style and Safety
NewsJul.09,2025
-
The Best 3-Wheel Scooters for Kids: Fun, Safety, and Adventure
NewsJul.09,2025
-
Revolutionize Your Ride: Affordable Electric Bikes
NewsJul.09,2025
-
Finding the Perfect Mountain Bike for Every Rider
NewsJul.09,2025


