- Afrikaans
- Albanian
- Amharic
- Arabic
- Armenian
- Azerbaijani
- Basque
- Belarusian
- Bengali
- Bosnian
- Bulgarian
- Catalan
- Cebuano
- Corsican
- Croatian
- Czech
- Danish
- Dutch
- English
- Esperanto
- Estonian
- Finnish
- French
- Frisian
- Galician
- Georgian
- German
- Greek
- Gujarati
- Haitian Creole
- hausa
- hawaiian
- Hebrew
- Hindi
- Miao
- Hungarian
- Icelandic
- igbo
- Indonesian
- irish
- Italian
- Japanese
- Javanese
- Kannada
- kazakh
- Khmer
- Rwandese
- Korean
- Kurdish
- Kyrgyz
- Lao
- Latin
- Latvian
- Lithuanian
- Luxembourgish
- Macedonian
- Malgashi
- Malay
- Malayalam
- Maltese
- Maori
- Marathi
- Mongolian
- Myanmar
- Nepali
- Norwegian
- Norwegian
- Occitan
- Pashto
- Persian
- Polish
- Portuguese
- Punjabi
- Romanian
- Russian
- Samoan
- Scottish Gaelic
- Serbian
- Sesotho
- Shona
- Sindhi
- Sinhala
- Slovak
- Slovenian
- Somali
- Spanish
- Sundanese
- Swahili
- Swedish
- Tagalog
- Tajik
- Tamil
- Tatar
- Telugu
- Thai
- Turkish
- Turkmen
- Ukrainian
- Urdu
- Uighur
- Uzbek
- Vietnamese
- Welsh
- Bantu
- Yiddish
- Yoruba
- Zulu
Dec . 12, 2024 03:25 Back to list
how to put a derailleur on a mountain bike
How to Install a Derailleur on a Mountain Bike
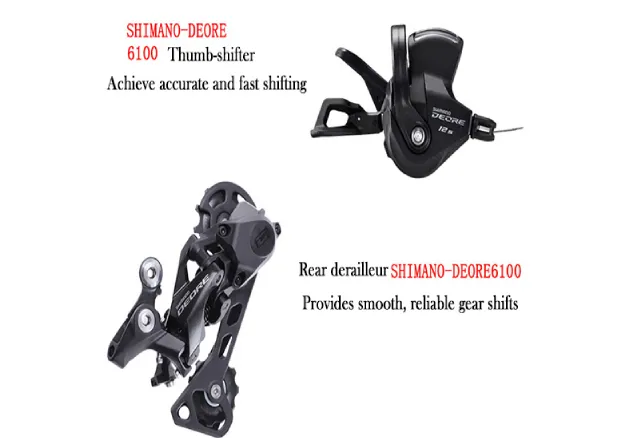
Installing a derailleur on your mountain bike can seem like a daunting task, but with some guidance and the right tools, you can do it yourself without much hassle. The derailleur plays a crucial role in the bike’s functioning, enabling smooth gear shifts. In this article, we will guide you through the process step-by-step.
Tools You Will Need
1. 2.5mm, 3mm, and 5mm Allen wrenches 2. Screwdriver (Phillips and flathead) 3. Chain tool 4. Measuring tape 5. Lubricant 6. Degreaser 7. A clean rag
Step 1 Prepare Your Workspace
Before you get started, ensure you have a clean and well-lit workspace. This will help you keep track of the parts and tools you'll use. You may also want to lay out a towel or mat to prevent dropping any small components.
Step 2 Remove the Old Derailleur
If you are replacing an old derailleur, begin by removing it. Use the appropriate Allen wrench to loosen the bolts holding the derailleur in place. Take note of how the derailleur is oriented, as you will want to replicate this with the new one. Disconnect the chain from the derailleur using the chain tool.
Step 3 Clean the Area
Before installing the new derailleur, take a moment to clean the derailleur hanger and surrounding area. Use a degreaser and a rag to remove any grime or grease. This will facilitate better attachment and performance.
Step 4 Install the New Derailleur
Take your new derailleur and orient it in the same manner as the old one. Align it with the derailleur hanger and tighten the bolt using the 5mm Allen wrench. Make sure it is secure but be careful not to over-tighten, as this may damage the hanger.
how to put a derailleur on a mountain bike

Step 5 Attach the Chain
Once the derailleur is firmly in place, it's time to reattach the chain. If you’re using a new chain, ensure that it is the correct length and properly threaded through the derailleur. The chain should go through the jockey wheels with the proper tension. If you’re unsure about the chain configuration, refer to the derailleur’s manual.
Step 6 Adjust the Limit Screws
Your derailleur will have two limit screws, usually labeled as “H” (high) and “L” (low). The high limit screw controls the outer limit of the derailleur movement, while the low limit screw controls the inner limit. Shift to the smallest chainring and smallest sprocket, then adjust the limit screws until the chain aligns perfectly with the sprocket.
Next, shift to the largest chainring and largest sprocket to adjust the low limit screw. Ensure that the chain doesn’t overshift into the spokes. Proper adjustment of these screws is crucial to avoid derailleur damage during gear shifts.
Step 7 Adjust the Cable Tension
Now that the derailleur is installed and the limits are set, it’s time to adjust the cable tension. Use the barrel adjuster located on the derailleur or the shifter to achieve optimal tension. You can do this by shifting through gears and observing how smoothly the derailleur moves between them. If the shift is sluggish, increase the tension; if it shifts too aggressively, decrease it.
Step 8 Test the Bike
After making all adjustments, take your bike for a test ride. Shift through all the gears while riding to ensure that everything is functioning smoothly. If you notice any skipping or rough shifts, you may need to revisit your adjustments.
Conclusion
Installing a derailleur on your mountain bike is a rewarding task that can enhance your riding experience significantly. With the right tools, a clear understanding of the process, and some patience, you can successfully install and adjust a derailleur. Regular maintenance of your bike and its components will ensure longevity and reliable performance. Happy cycling!
-
The Ultimate Kids' Four-Wheeler Experience
NewsJul.09,2025
-
The Ultimate Guide to Mountain Bikes: Gear Up for Your Ride
NewsJul.09,2025
-
The New Age of Cycling: Electric Bikes for Every Rider
NewsJul.09,2025
-
The Best Kids Bicycles: Ride in Style and Safety
NewsJul.09,2025
-
The Best 3-Wheel Scooters for Kids: Fun, Safety, and Adventure
NewsJul.09,2025
-
Revolutionize Your Ride: Affordable Electric Bikes
NewsJul.09,2025
-
Finding the Perfect Mountain Bike for Every Rider
NewsJul.09,2025


