- Afrikaans
- Albanian
- Amharic
- Arabic
- Armenian
- Azerbaijani
- Basque
- Belarusian
- Bengali
- Bosnian
- Bulgarian
- Catalan
- Cebuano
- Corsican
- Croatian
- Czech
- Danish
- Dutch
- English
- Esperanto
- Estonian
- Finnish
- French
- Frisian
- Galician
- Georgian
- German
- Greek
- Gujarati
- Haitian Creole
- hausa
- hawaiian
- Hebrew
- Hindi
- Miao
- Hungarian
- Icelandic
- igbo
- Indonesian
- irish
- Italian
- Japanese
- Javanese
- Kannada
- kazakh
- Khmer
- Rwandese
- Korean
- Kurdish
- Kyrgyz
- Lao
- Latin
- Latvian
- Lithuanian
- Luxembourgish
- Macedonian
- Malgashi
- Malay
- Malayalam
- Maltese
- Maori
- Marathi
- Mongolian
- Myanmar
- Nepali
- Norwegian
- Norwegian
- Occitan
- Pashto
- Persian
- Polish
- Portuguese
- Punjabi
- Romanian
- Russian
- Samoan
- Scottish Gaelic
- Serbian
- Sesotho
- Shona
- Sindhi
- Sinhala
- Slovak
- Slovenian
- Somali
- Spanish
- Sundanese
- Swahili
- Swedish
- Tagalog
- Tajik
- Tamil
- Tatar
- Telugu
- Thai
- Turkish
- Turkmen
- Ukrainian
- Urdu
- Uighur
- Uzbek
- Vietnamese
- Welsh
- Bantu
- Yiddish
- Yoruba
- Zulu
Dec . 11, 2024 10:38 Back to list
Guide to Installing a Rear Derailleur for Your Mountain Bike in Simple Steps
How to Install a Mountain Bike Rear Derailleur
Installing a rear derailleur on your mountain bike may seem daunting, but with the right tools and a little guidance, it can be a straightforward process. The rear derailleur is crucial for shifting gears, allowing for better control and efficiency on varied terrains. This guide will walk you through the steps necessary to install or replace your mountain bike's rear derailleur.
Tools Required
Before you begin, make sure you have the following tools at hand
- 5mm Allen wrench (or screwdriver depending on your derailleur) - 2mm Allen wrench (if you have a high-end derailleur) - Chain tool (for chain adjustments) - Torque wrench (optional but recommended for proper tightening) - Lubricant (for the chain)
Step 1 Prepare the Bike
First, ensure that your mountain bike is secure. Ideally, use a bike stand to hold it upright. Shift your bike into the smallest rear cog and the front chainring. This will relieve tension on the derailleur, making it easier to install or remove.
Step 2 Remove the Old Derailleur
If you are replacing an old derailleur, you need to take it off first. Locate the mounting bolt on the derailleur and use the 5mm Allen wrench to remove it. Once unscrewed, gently detach the derailleur from the derailleur hanger. If your bike has a chain that is still intact, the derailleur will still be connected to the chain. To fully remove the old derailleur, you may need to break or remove the chain using your chain tool.
Step 3 Install the New Derailleur
Position the new derailleur at the derailleur hanger, ensuring that the alignment is correct. The derailleur should hang straight, and the jockey wheels should be in line with the rear cassette. Secure the derailleur in place by tightening the mounting bolt with your Allen wrench. Be sure not to overtighten as this could strip the threads; a snug fit is sufficient.
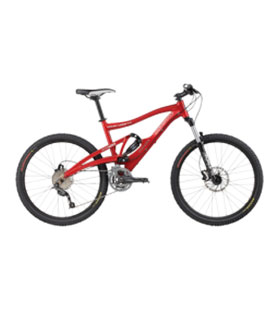
how to install a mountain bike rear derailleur

Step 4 Attach the Chain
If you removed the chain earlier, it's time to reattach it. Feed the chain through the jockey wheels of the new derailleur, ensuring it follows the correct path. The chain should run from the cassette, up through the upper jockey wheel, and down through the lower jockey wheel. If necessary, adjust the chain length to accommodate the derailleur’s capacity. A chain that is too long can cause poor shifting performance and a chain that is too short can damage components.
Step 5 Adjust the Limit Screws
The next step is to adjust the limit screws, which ensure that the derailleur doesn’t push the chain beyond the smallest and largest cogs. Find the two limit screws marked as “H” (high) and “L” (low).
- High Limit Adjustment Shift to the smallest cog. Adjust the “H” screw until the derailleur aligns perfectly with the cog. - Low Limit Adjustment Shift to the largest cog and adjust the “L” screw similarly. Ensure that the derailleur does not push the chain off the cassette altogether.
Step 6 Fine-tune Cable Tension
Using your 2mm Allen wrench, locate the barrel adjuster on the derailleur. To increase cable tension, rotate it counter-clockwise; to decrease, rotate it clockwise. Test the shifting functionality by cycling through the gears. Fine-tune the adjustment until shifting is smooth and precise.
Step 7 Test Ride and Final Adjustments
After installation, take your bike for a test ride. Shift through all the gears to ensure smooth operation. If you encounter any issues with skipping or sticking, readjust the cable tension or the limit screws as necessary.
Conclusion
Installing a rear derailleur on a mountain bike requires patience and precision, but it’s a rewarding skill that enhances your riding experience. Regular maintenance of your derailleur will prolong its life and improve performance. Happy biking!
-
The Ultimate Kids' Four-Wheeler Experience
NewsJul.09,2025
-
The Ultimate Guide to Mountain Bikes: Gear Up for Your Ride
NewsJul.09,2025
-
The New Age of Cycling: Electric Bikes for Every Rider
NewsJul.09,2025
-
The Best Kids Bicycles: Ride in Style and Safety
NewsJul.09,2025
-
The Best 3-Wheel Scooters for Kids: Fun, Safety, and Adventure
NewsJul.09,2025
-
Revolutionize Your Ride: Affordable Electric Bikes
NewsJul.09,2025
-
Finding the Perfect Mountain Bike for Every Rider
NewsJul.09,2025


