


Mar . 04, 2025 03:23 Back to list
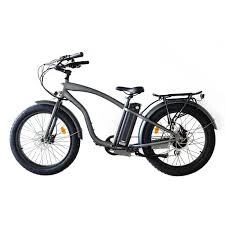
derailleur on mountain bike
Changing a derailleur on a mountain bike can be a daunting task, especially if you're new to bike maintenance. However, with the right guidance and tools, anyone can master this essential skill. This article will provide you with a comprehensive guide, drawing from expert experience, to help you change a derailleur efficiently and with confidence.
The next step involves reconnecting the derailleur cable. Thread the cable through the derailleur's groove and secure it using the cable pinch bolt. During this stage, ensure there’s neither slack nor excessive tension in the cable. Fine-tuning the derailleur settings is critical for optimal performance. Begin by adjusting the high-limit screw to prevent the chain from shifting beyond the highest gear. Next, adjust the low-limit screw so the chain doesn’t fall off the smallest sprocket. These adjustments can often be performed using a small screwdriver. Afterward, fine-tune the tension using the barrel adjuster. Shift through the gears and tweak until the chain moves smoothly between cogs without hesitation. This may require multiple attempts to perfect. Lastly, check your work. Riding the bike in a controlled environment will ensure that adjustments were made correctly. Listen for unusual noises or observe any sluggish shifting. If issues persist, re-check the hanger alignment and screw adjustments. Throughout the replacement process, maintaining attention to detail enhances both performance and component longevity. A correctly installed and adjusted derailleur will improve your mountain biking experience, providing seamless gear transitions as you tackle varied terrains. Investing time in learning this crucial maintenance skill not only saves money otherwise spent on professional services but also builds familiarity with your bike's mechanics — a wealthy asset for any cycling enthusiast. Keeping your mountain bike in top shape ensures safety, efficiency, and the sheer joy of riding on any trail you encounter. In conclusion, understanding how to change and adjust a mountain bike derailleur propels you from a novice to a knowledgeable cyclist, ready to maintain your equipment in pristine condition. As you gain confidence, you’ll likely find the process rewarding, further enriching your biking adventures.

The next step involves reconnecting the derailleur cable. Thread the cable through the derailleur's groove and secure it using the cable pinch bolt. During this stage, ensure there’s neither slack nor excessive tension in the cable. Fine-tuning the derailleur settings is critical for optimal performance. Begin by adjusting the high-limit screw to prevent the chain from shifting beyond the highest gear. Next, adjust the low-limit screw so the chain doesn’t fall off the smallest sprocket. These adjustments can often be performed using a small screwdriver. Afterward, fine-tune the tension using the barrel adjuster. Shift through the gears and tweak until the chain moves smoothly between cogs without hesitation. This may require multiple attempts to perfect. Lastly, check your work. Riding the bike in a controlled environment will ensure that adjustments were made correctly. Listen for unusual noises or observe any sluggish shifting. If issues persist, re-check the hanger alignment and screw adjustments. Throughout the replacement process, maintaining attention to detail enhances both performance and component longevity. A correctly installed and adjusted derailleur will improve your mountain biking experience, providing seamless gear transitions as you tackle varied terrains. Investing time in learning this crucial maintenance skill not only saves money otherwise spent on professional services but also builds familiarity with your bike's mechanics — a wealthy asset for any cycling enthusiast. Keeping your mountain bike in top shape ensures safety, efficiency, and the sheer joy of riding on any trail you encounter. In conclusion, understanding how to change and adjust a mountain bike derailleur propels you from a novice to a knowledgeable cyclist, ready to maintain your equipment in pristine condition. As you gain confidence, you’ll likely find the process rewarding, further enriching your biking adventures.
Latest news
-
In-Depth Guide to Ebike Frames: Design, Use & Future Trends
NewsNov.25,2025
-
Discover Top E Bike Brand Insights, Specs & Future Trends | Yanline Bike
NewsNov.24,2025
-
Green E Bike – The Future of Sustainable Urban Mobility
NewsNov.24,2025
-
Ruffian eBike: Durable, Efficient Electric Bikes for Modern Mobility
NewsNov.23,2025
-
Comprehensive Guide to the Global E Bike Market and Future Trends
NewsNov.23,2025
-
Understanding Electric Bicycle Range: A Complete Guide for Smarter E-Bike Use
NewsNov.22,2025
-
Ceron Electric Bike – Efficient, Sustainable Urban Mobility Solutions
NewsNov.22,2025