- Afrikaans
- Albanian
- Amharic
- Arabic
- Armenian
- Azerbaijani
- Basque
- Belarusian
- Bengali
- Bosnian
- Bulgarian
- Catalan
- Cebuano
- Corsican
- Croatian
- Czech
- Danish
- Dutch
- English
- Esperanto
- Estonian
- Finnish
- French
- Frisian
- Galician
- Georgian
- German
- Greek
- Gujarati
- Haitian Creole
- hausa
- hawaiian
- Hebrew
- Hindi
- Miao
- Hungarian
- Icelandic
- igbo
- Indonesian
- irish
- Italian
- Japanese
- Javanese
- Kannada
- kazakh
- Khmer
- Rwandese
- Korean
- Kurdish
- Kyrgyz
- Lao
- Latin
- Latvian
- Lithuanian
- Luxembourgish
- Macedonian
- Malgashi
- Malay
- Malayalam
- Maltese
- Maori
- Marathi
- Mongolian
- Myanmar
- Nepali
- Norwegian
- Norwegian
- Occitan
- Pashto
- Persian
- Polish
- Portuguese
- Punjabi
- Romanian
- Russian
- Samoan
- Scottish Gaelic
- Serbian
- Sesotho
- Shona
- Sindhi
- Sinhala
- Slovak
- Slovenian
- Somali
- Spanish
- Sundanese
- Swahili
- Swedish
- Tagalog
- Tajik
- Tamil
- Tatar
- Telugu
- Thai
- Turkish
- Turkmen
- Ukrainian
- Urdu
- Uighur
- Uzbek
- Vietnamese
- Welsh
- Bantu
- Yiddish
- Yoruba
- Zulu
Dec . 05, 2024 14:56 Back to list
how to adjust shimano rear derailleur on mountain bike
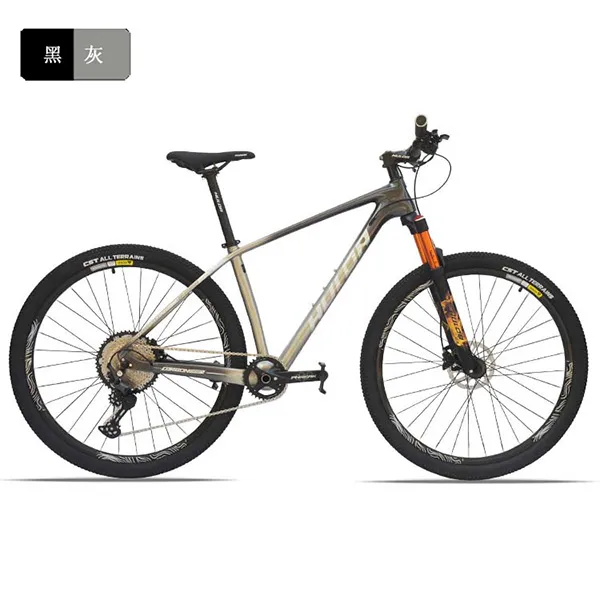
How to Adjust Shimano Rear Derailleur on a Mountain Bike
Proper adjustment of the Shimano rear derailleur is crucial for ensuring smooth and accurate gear shifting on your mountain bike. A well-tuned derailleur can significantly enhance your riding experience, making climbs easier and descents safer. Below is a step-by-step guide on how to adjust your Shimano rear derailleur effectively.
Tools You Will Need Before starting the adjustment process, gather the necessary tools - A Phillips screwdriver - An Allen wrench (usually 4mm or 5mm) - A chain checker tool (optional) - A bike stand (optional but recommended) - Lubricant (optional)
Step 1 Inspect Your Setup Begin by checking the entire drivetrain for any wear or damage. This includes the chain, cassette, and derailleur. A worn chain or cassette can lead to poor shifting performance and will require replacement before adjusting the derailleur. Ensure the bike is clean and well-lubricated for best results.
Step 2 Check Cable Tension The first adjustment to make involves the cable tension. If the cable is too loose, the derailleur won’t move appropriately. On the other hand, if it is too tight, it could cause the derailleur to shift out of bounds. To check cable tension 1. Shift to the largest chainring in the front and the smallest cog in the rear. 2. Observe if the derailleur maintains its position. If it droops or struggles to reach the smallest cog, adjust the barrel adjuster (located where the cable enters the rear derailleur) counterclockwise to increase the tension.
Step 3 Adjust Limit Screws The next critical step involves setting the limit screws, which prevent the derailleur from shifting beyond the largest or smallest cogs
. The screws are usually marked as ‘H’ (high) for the smallest cog and ‘L’ (low) for the largest cog.how to adjust shimano rear derailleur on mountain bike

1. High Limit Adjustment (H) - Shift to the smallest rear cog. - Locate the ‘H’ screw and adjust it until the derailleur aligns perfectly with the cog without rubbing. 2. Low Limit Adjustment (L) - Next, shift to the largest rear cog. - Adjust the ‘L’ screw to ensure the derailleur aligns with the cog. It should not allow the chain to fall off into the spokes.
Step 4 Fine-Tuning the B-Screw The B-screw adjusts the distance between the derailleur and the cassette. Proper spacing ensures smooth shifting and minimizes chain wear. To adjust 1. Shift to the largest rear cog. 2. Loosen the B-screw until there is about 5-6mm space between the top pulley of the derailleur and the largest cog. Tighten the screw once the distance is satisfactory.
Step 5 Test Your Adjustments Now that your adjustments are made, it’s essential to test the shifting. Shift through all the gears while pedaling lightly to ensure smooth transitions from gear to gear. If you notice any skipping or hesitation, you may need to revisit your adjustments.
Step 6 Final Inspection and Maintenance Once satisfied with the shifting performance, give your bike a final inspection. Check that all screws are tightened, and the derailleur is positioned correctly. Also, consider cleaning and lubricating your chain and drivetrain components to maintain performance.
Conclusion Adjusting the Shimano rear derailleur on your mountain bike may seem daunting, but with the right approach and a little patience, it can be a straightforward process. Regular adjustments and maintenance can prolong the life of your components and enhance your biking experience. Remember that practice makes perfect; the more you maintain your bike, the better you’ll become at diagnosing issues and making adjustments. Happy riding!
-
The Ultimate Kids' Four-Wheeler Experience
NewsJul.09,2025
-
The Ultimate Guide to Mountain Bikes: Gear Up for Your Ride
NewsJul.09,2025
-
The New Age of Cycling: Electric Bikes for Every Rider
NewsJul.09,2025
-
The Best Kids Bicycles: Ride in Style and Safety
NewsJul.09,2025
-
The Best 3-Wheel Scooters for Kids: Fun, Safety, and Adventure
NewsJul.09,2025
-
Revolutionize Your Ride: Affordable Electric Bikes
NewsJul.09,2025
-
Finding the Perfect Mountain Bike for Every Rider
NewsJul.09,2025


