- Afrikaans
- Albanian
- Amharic
- Arabic
- Armenian
- Azerbaijani
- Basque
- Belarusian
- Bengali
- Bosnian
- Bulgarian
- Catalan
- Cebuano
- Corsican
- Croatian
- Czech
- Danish
- Dutch
- English
- Esperanto
- Estonian
- Finnish
- French
- Frisian
- Galician
- Georgian
- German
- Greek
- Gujarati
- Haitian Creole
- hausa
- hawaiian
- Hebrew
- Hindi
- Miao
- Hungarian
- Icelandic
- igbo
- Indonesian
- irish
- Italian
- Japanese
- Javanese
- Kannada
- kazakh
- Khmer
- Rwandese
- Korean
- Kurdish
- Kyrgyz
- Lao
- Latin
- Latvian
- Lithuanian
- Luxembourgish
- Macedonian
- Malgashi
- Malay
- Malayalam
- Maltese
- Maori
- Marathi
- Mongolian
- Myanmar
- Nepali
- Norwegian
- Norwegian
- Occitan
- Pashto
- Persian
- Polish
- Portuguese
- Punjabi
- Romanian
- Russian
- Samoan
- Scottish Gaelic
- Serbian
- Sesotho
- Shona
- Sindhi
- Sinhala
- Slovak
- Slovenian
- Somali
- Spanish
- Sundanese
- Swahili
- Swedish
- Tagalog
- Tajik
- Tamil
- Tatar
- Telugu
- Thai
- Turkish
- Turkmen
- Ukrainian
- Urdu
- Uighur
- Uzbek
- Vietnamese
- Welsh
- Bantu
- Yiddish
- Yoruba
- Zulu
Nov . 12, 2024 00:40 Back to list
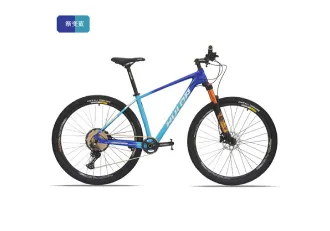
adjusting a rear derailleur on a mountain bike
How to Adjust a Rear Derailleur on a Mountain Bike
The rear derailleur is a crucial component of a mountain bike’s drivetrain, allowing you to shift gears smoothly and efficiently. Proper adjustment of the rear derailleur is essential for optimal performance, ensuring that you can tackle challenging trails without the frustration of skipping gears or poor shifting. In this guide, we'll walk you through the steps to adjust your rear derailleur, helping you get back on the trail with confidence.
Understanding the Parts
Before diving into the adjustment process, it’s important to familiarize yourself with the main parts of the rear derailleur
1. H-Screw This screw regulates the highest gear limit, preventing the chain from moving beyond the smallest cog. 2. L-Screw This screw sets the lowest gear limit, stopping the chain from falling off the largest cog. 3. B-Screw This screw adjusts the distance between the derailleur and the cogs, facilitating proper alignment when shifting. 4. Cable Tension The tension in the cable affects how the derailleur moves; too loose or too tight can impair shifting.
Tools Required
To adjust the rear derailleur, you will need
- 5mm Allen wrench - Screwdriver (depending on the screw type) - Chain checker (optional, for assessing chain wear)
Step-by-step Guide to Adjusting the Rear Derailleur
adjusting a rear derailleur on a mountain bike

1. Check the Cable Tension Shift your bike into the smallest chainring and the largest rear cog. Check the cable tension by pulling on the cable gently. If it feels loose, you’ll need to adjust the barrel adjuster (usually located where the cable enters the derailleur) clockwise to increase tension.
2. Set the H-Screw Shift to the smallest cog. The chain should sit smoothly on the smallest cog without rubbing against the derailleur. If the chain struggles to shift onto the smallest cog, adjust the H-screw clockwise. If the derailleur struggles to shift back to the largest cog, turn it counterclockwise.
3. Set the L-Screw Now, shift to the largest rear cog. The chain should align properly without falling off. Adjust the L-screw clockwise if the chain is rubbing the derailleur or counterclockwise if the chain falls off the largest cog.
4. Adjust the B-Screw With the chain in the largest cog, check the distance between the top pulley of the derailleur and the cog. Ideally, there should be about 6-8mm of clearance. If the derailleur is too close, adjust the B-screw clockwise to increase the distance.
5. Fine-Tune Cable Tension Once you’ve set the limits and B-screw, do a quick test by shifting through the gears. If the shifts feel slow or inconsistent, further fine-tune the cable tension using the barrel adjuster.
6. Test Ride After adjustments, take your bike for a test ride. Shift through all the gears to ensure smooth operation. If you encounter any issues, repeat the previous steps, focusing on the cable tension and limit screws.
Final Tips
- Ensure your chain and gears are clean and well-lubricated. A clean drivetrain enhances shifting performance. - Regularly check and maintain your derailleur adjustments, especially after lengthy rides or rough terrains, as components may become loose over time. - If you’re uncertain about making these adjustments, don't hesitate to consult a professional bike mechanic.
By following these steps, you can ensure that your mountain bike's rear derailleur is properly adjusted for peak performance. Smooth shifting will allow you to enjoy your rides more fully, tackling any trail with the precision and power you need. Happy riding!
-
The Ultimate Kids' Four-Wheeler Experience
NewsJul.09,2025
-
The Ultimate Guide to Mountain Bikes: Gear Up for Your Ride
NewsJul.09,2025
-
The New Age of Cycling: Electric Bikes for Every Rider
NewsJul.09,2025
-
The Best Kids Bicycles: Ride in Style and Safety
NewsJul.09,2025
-
The Best 3-Wheel Scooters for Kids: Fun, Safety, and Adventure
NewsJul.09,2025
-
Revolutionize Your Ride: Affordable Electric Bikes
NewsJul.09,2025
-
Finding the Perfect Mountain Bike for Every Rider
NewsJul.09,2025


