- Afrikaans
- Albanian
- Amharic
- Arabic
- Armenian
- Azerbaijani
- Basque
- Belarusian
- Bengali
- Bosnian
- Bulgarian
- Catalan
- Cebuano
- Corsican
- Croatian
- Czech
- Danish
- Dutch
- English
- Esperanto
- Estonian
- Finnish
- French
- Frisian
- Galician
- Georgian
- German
- Greek
- Gujarati
- Haitian Creole
- hausa
- hawaiian
- Hebrew
- Hindi
- Miao
- Hungarian
- Icelandic
- igbo
- Indonesian
- irish
- Italian
- Japanese
- Javanese
- Kannada
- kazakh
- Khmer
- Rwandese
- Korean
- Kurdish
- Kyrgyz
- Lao
- Latin
- Latvian
- Lithuanian
- Luxembourgish
- Macedonian
- Malgashi
- Malay
- Malayalam
- Maltese
- Maori
- Marathi
- Mongolian
- Myanmar
- Nepali
- Norwegian
- Norwegian
- Occitan
- Pashto
- Persian
- Polish
- Portuguese
- Punjabi
- Romanian
- Russian
- Samoan
- Scottish Gaelic
- Serbian
- Sesotho
- Shona
- Sindhi
- Sinhala
- Slovak
- Slovenian
- Somali
- Spanish
- Sundanese
- Swahili
- Swedish
- Tagalog
- Tajik
- Tamil
- Tatar
- Telugu
- Thai
- Turkish
- Turkmen
- Ukrainian
- Urdu
- Uighur
- Uzbek
- Vietnamese
- Welsh
- Bantu
- Yiddish
- Yoruba
- Zulu
Nov . 23, 2024 20:14 Back to list
adjusting a derailleur on a mountain bike
Adjusting a Derailleur on a Mountain Bike A Step-by-Step Guide
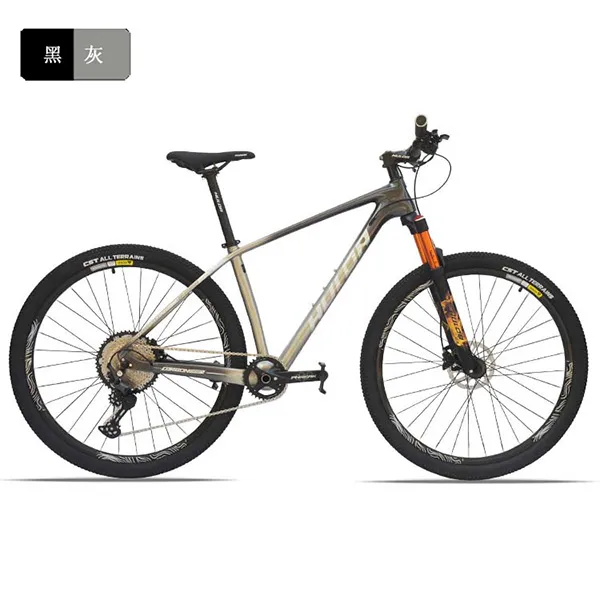
Maintaining your mountain bike is crucial for optimal performance, and one of the most important components you need to adjust regularly is the derailleur. This system, which moves the chain between gears, plays a vital role in the overall functionality of your bike. A properly adjusted derailleur will ensure smooth shifting and prolong the life of your drivetrain. Here’s a step-by-step guide to help you adjust the derailleur on your mountain bike.
Tools You Will Need
Before getting started, gather the necessary tools a Phillips screwdriver, a flathead screwdriver, an 8mm Allen wrench, and a bike stand or a way to hold the bike in an upright position. Having these tools on hand will make the process smoother and more efficient.
Step 1 Inspect the Derailleur
Begin by visually inspecting the derailleur. Check for any damage, bends, or misalignments, as these can hinder its function. Ensure that the cable is not frayed and the housing is intact. If you notice any significant damage, you may need a replacement rather than an adjustment.
Step 2 Set the Limit Screws
The derailleur has two limit screws, usually marked with an H for high gear (smallest cog) and an L for low gear (largest cog). Shift your bike into the smallest chainring and the highest gear. Locate the limit screws and adjust them so that the derailleur sits just above the smallest cog without rubbing. Repeat this step for the low gear by shifting into the largest cog. This adjustment prevents the chain from falling off the cogs.
Tip Turn the screws clockwise to tighten and counterclockwise to loosen
.adjusting a derailleur on a mountain bike

Step 3 Adjust the Cable Tension
Next, check the cable tension. If shifts are not crisp and precise, the tension may be too loose. Shift to the middle gear and look at how the derailleur moves. You can adjust the tension by using the barrel adjuster located at the derailleur or on the shifter. Turn the adjuster counterclockwise to increase tension and clockwise to decrease it. Make small adjustments and test the shifting after each change until you find the sweet spot.
Step 4 Fine-Tune the Shift Performance
To fine-tune the derailleur's performance, shift through all the gears. Listen for any skipping or grinding noises that indicate improper alignment or tension issues. Make further micro-adjustments to the limit screws and cable tension as needed. When the shifting feels smooth and reliable, you’ve done well!
Step 5 Final Test Ride
Once you've successfully adjusted the derailleur, take your mountain bike for a test ride. Pay attention to how the bike shifts under load and throughout different terrains. This real-world test will ensure everything is functioning optimally.
Conclusion
Adjusting the derailleur on your mountain bike might seem daunting, but it’s a manageable task that can greatly enhance your riding experience. Regular adjustments not only lead to smoother shifting but also contribute to a more enjoyable and efficient ride. Remember, if you encounter any issues beyond simple adjustments, consider seeking help from a professional bike mechanic. Happy cycling!
-
The Ultimate Kids' Four-Wheeler Experience
NewsJul.09,2025
-
The Ultimate Guide to Mountain Bikes: Gear Up for Your Ride
NewsJul.09,2025
-
The New Age of Cycling: Electric Bikes for Every Rider
NewsJul.09,2025
-
The Best Kids Bicycles: Ride in Style and Safety
NewsJul.09,2025
-
The Best 3-Wheel Scooters for Kids: Fun, Safety, and Adventure
NewsJul.09,2025
-
Revolutionize Your Ride: Affordable Electric Bikes
NewsJul.09,2025
-
Finding the Perfect Mountain Bike for Every Rider
NewsJul.09,2025


