- Afrikaans
- Albanian
- Amharic
- Arabic
- Armenian
- Azerbaijani
- Basque
- Belarusian
- Bengali
- Bosnian
- Bulgarian
- Catalan
- Cebuano
- Corsican
- Croatian
- Czech
- Danish
- Dutch
- English
- Esperanto
- Estonian
- Finnish
- French
- Frisian
- Galician
- Georgian
- German
- Greek
- Gujarati
- Haitian Creole
- hausa
- hawaiian
- Hebrew
- Hindi
- Miao
- Hungarian
- Icelandic
- igbo
- Indonesian
- irish
- Italian
- Japanese
- Javanese
- Kannada
- kazakh
- Khmer
- Rwandese
- Korean
- Kurdish
- Kyrgyz
- Lao
- Latin
- Latvian
- Lithuanian
- Luxembourgish
- Macedonian
- Malgashi
- Malay
- Malayalam
- Maltese
- Maori
- Marathi
- Mongolian
- Myanmar
- Nepali
- Norwegian
- Norwegian
- Occitan
- Pashto
- Persian
- Polish
- Portuguese
- Punjabi
- Romanian
- Russian
- Samoan
- Scottish Gaelic
- Serbian
- Sesotho
- Shona
- Sindhi
- Sinhala
- Slovak
- Slovenian
- Somali
- Spanish
- Sundanese
- Swahili
- Swedish
- Tagalog
- Tajik
- Tamil
- Tatar
- Telugu
- Thai
- Turkish
- Turkmen
- Ukrainian
- Urdu
- Uighur
- Uzbek
- Vietnamese
- Welsh
- Bantu
- Yiddish
- Yoruba
- Zulu
Jul . 25, 2024 09:44 Back to list
A Comprehensive Guide to Installing Shifters on Your Mountain Bike for Optimal Performance
How to Install Mountain Bike Shifters
Mountain biking is an exhilarating sport that demands both skill and the right equipment. One of the most critical components in your bike's performance is the shifter. Installing new mountain bike shifters might seem daunting, but with the right tools and a bit of patience, it can be a straightforward process. Whether you're upgrading your shifters or replacing worn-out ones, here’s a comprehensive guide on how to install them properly.
Tools You Will Need
Before you begin, gather your tools. You will typically need
1. Screwdrivers (flathead and Phillips) 2. Allen wrenches (usually 4mm, 5mm, and 6mm) 3. Cable cutter 4. Bike stand (optional but recommended) 5. Lubricant (for cables and housing)
Having these tools at your disposal will make the installation process more efficient and enjoyable
.Step-by-Step Installation Process
1. Remove Old Shifters Start by removing the old shifters. If you have grip shifters, twist them off the handlebars. If you have trigger shifters, use the appropriate Allen wrench to loosen the bolts and slide them off. Take note of the cable routing, as this will help during the reinstallation of your new shifters.
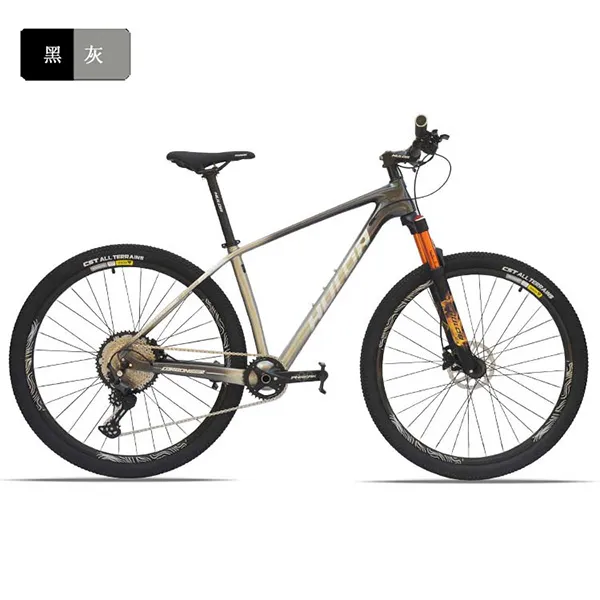
how to install mountain bike shifters

2. Install New Shifters Position your new shifters on the handlebars. If you are using trigger shifters, ensure they are mounted comfortably for your thumb to reach. Grip shifters should be aligned with the direction of your grip. Tighten the bolts carefully, but avoid overtightening to prevent damaging the handlebars.
3. Threading the Cables Once the shifters are in place, it’s time to thread the cables. Begin by pulling the cable through the shifter. Consult the manufacturer’s instructions for specific details on threading since each shifter model may have slight variations. Make sure the cable moves smoothly as you tighten it into position.
4. Attach the Cables to the Derailleur With the cables threaded through the shifters, the next step is to connect them to the derailleur. Start by disconnecting your old derailleur cable if you haven’t already. Attach the new cable to the derailleur’s cable anchor. Ensure it is secure and properly aligned.
5. Adjust Cable Tension After the cables are secured, it’s essential to adjust the cable tension correctly. Shift to the lowest gear and ensure the derailleur moves smoothly without any stutters. Adjust the barrel adjuster on the shifter to fine-tune the tension until the shifting feels optimal. This step is crucial for seamless gear changes.
6. Test the Shifters Before taking your bike for a ride, test the shifters while the bike is still on the stand. Shift through all the gears in both the front and rear derailleurs to ensure everything is functioning correctly. Look for any signs of skipping or misalignment.
7. Final Checks and Ride Inspect the entire setup to ensure everything is tight and secure. Check your brake and derailleur adjustments as well. Once you’re satisfied with the installation, take your bike out for a test ride. Adjust as necessary based on your experience.
Conclusion
Installing mountain bike shifters can improve your riding experience significantly. A well-functioning shifter ensures smooth and precise gear changes, which are essential for tackling various terrains. By following these steps and taking your time, you can successfully install shifters on your mountain bike, enhancing both performance and enjoyment on your rides. Happy biking!
-
The Ultimate Kids' Four-Wheeler Experience
NewsJul.09,2025
-
The Ultimate Guide to Mountain Bikes: Gear Up for Your Ride
NewsJul.09,2025
-
The New Age of Cycling: Electric Bikes for Every Rider
NewsJul.09,2025
-
The Best Kids Bicycles: Ride in Style and Safety
NewsJul.09,2025
-
The Best 3-Wheel Scooters for Kids: Fun, Safety, and Adventure
NewsJul.09,2025
-
Revolutionize Your Ride: Affordable Electric Bikes
NewsJul.09,2025
-
Finding the Perfect Mountain Bike for Every Rider
NewsJul.09,2025


