


Oct . 10, 2024 12:42 Back to list
How to Troubleshoot and Repair a Mountain Bike Derailleur Efficiency
How to Fix a Derailleur on a Mountain Bike
Mountain biking is an exhilarating way to explore trails, but it can sometimes come with mechanical issues. One of the most common problems bikers face is dealing with a malfunctioning derailleur. The derailleur is a critical component of your bike’s shifting system, responsible for moving the chain between gears. A malfunctioning derailleur can lead to poor shifting performance, chain slips, or even complete gear failure. Fortunately, fixing a derailleur is a manageable task for those willing to get their hands dirty. Here’s a step-by-step guide to help you fix a derailleur on your mountain bike.
Tools You'll Need Before you start, gather the necessary tools - Allen wrenches - Screwdriver (Phillips and flat-head) - Chain checker - Bike stand (optional but helpful) - Lubricant
Step 1 Assess the Problem Begin by identifying the specific issue with the derailleur. Common symptoms include the chain not shifting properly, dropping gears, or skipping. Check if the derailleur hanger is bent; use a derailleur alignment tool for precision. If it's bent, it can often be gently straightened with pliers.
Step 2 Check Cable Tension If the derailleur itself appears to be in good condition, the issue may lie in the tension of the cable. To check this, shift to the smallest chainring (front) and the largest cog (rear). Pull the derailleur towards the rear wheel and observe if there’s slack in the cable. If there is, you’ll need to increase the tension.
Step 3 Adjust Limit Screws Limit screws control how far the derailleur can move. There are two screws one for the high limit (smallest cog) and one for the low limit (largest cog). Using a screwdriver, adjust these screws until the derailleur can shift smoothly between gears without throwing the chain off.
fix derailleur on mountain bike
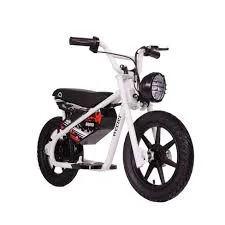
Step 4 Align the Derailleur Make sure the derailleur is parallel to the cassette. If it's misaligned, loosen the mounting bolt slightly and adjust its position. Retighten the bolt once you’re satisfied with the alignment.
Step 5 Lubricate the Components A well-lubricated derailleur can operate more smoothly. Use a bicycle-specific lubricant on the pivot points of the derailleur and the cable housing. Avoid over-lubricating, as excess can attract dirt and grime.
Step 6 Test the Shifting After making adjustments, it’s time to test the shifting. Shift through all the gears while pedaling gently. Pay attention for any skipping or delayed shifts. If the bike shifts smoothly, congratulations—you’ve successfully fixed the derailleur!
Step 7 Regular Maintenance Prevention is key. Regularly check your derailleur for alignment and cable tension during routine bike maintenance. Cleaning the derailleurs and applying lubricant can prevent buildup that leads to shifting issues.
Conclusion Fixing a derailleur on your mountain bike may seem daunting, but with the right tools and approach, it can be a straightforward process. Developing a basic understanding of your bike’s mechanics not only enhances your riding experience but also builds confidence on the trails. Next time you encounter derailleur issues, keep this guide handy, and you’ll be able to tackle the problem head-on. Happy riding!
-
Childrens Mountain Bikes: Comparing 12, 16 and 20 Inch Children’s Bicycle Options
NewsNov.03,2026
-
Electric Bicycle FAQ: Specifications, Ordering & Support for the Tanke Series 48V20AH E-Bike
NewsOct.28,2026
-
The Ultimate Guide to Choosing the Perfect ebike commuter
NewsJul.01,2026
-
Best Electric Bikes for Seniors Guide to Mobility and Safety
NewsJun.29,2026
-
Ultimate Guide to Choosing the Best e bikes for seniors
NewsJun.27,2026
-
The Ultimate Guide to Choosing Your Best Electric Push Bike
NewsJun.26,2026
-
Complete Guide to e bike finance for High Performance Models
NewsJun.25,2026